# Download and Install OpenVINO
# Download OpenVINO
Download the Intel Distribution of OpenVINO Toolkit (opens new window) from Intel website.
If you don't have an Intel account, you need to register first, submit the login information, then enter the download interface, "choose a version",select 2020 3 TLS, and write down your verification code.
The following guidance is performed on Ubuntu 16.04,64 bit OS
# Unpack installation package
- Open a command prompt terminal window.
- Change directories to where you downloaded the Intel Distribution of OpenVINO toolkit for Linux* package file.If you downloaded the package file to the current user's Downloads directory:
cd ~/Downloads/By default, the file is saved as l_openvino_toolkit_p_<version>.tgz. - Unpack the .tgz file:
tar -xvzf l_openvino_toolkit_p_.tgz
# Start installing OpenVINO
- Open the terminal, enter the folder generated after decompression, and run the command to install
Option 1:GUI Installation Wizard:sudo ./install_GUI.sh
Option 2:Command-Line Instructions:
sudo ./install.sh - The following uses GUI installation as an example, which is also applicable to command line installation. Enter the installation interface:
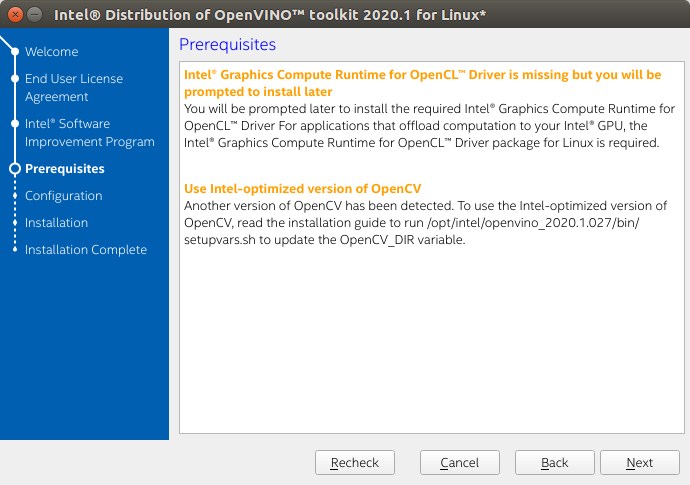
- If you select the default options, the Installation summary GUI screen looks like this:
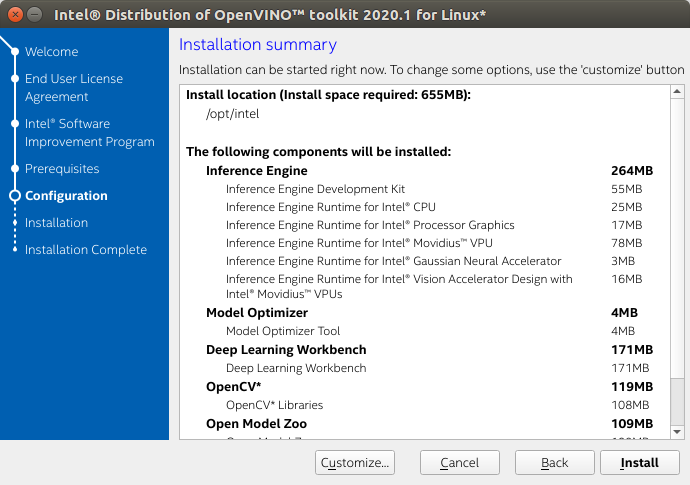
- You can choose Customize to change the installation directory or the components you want to install:
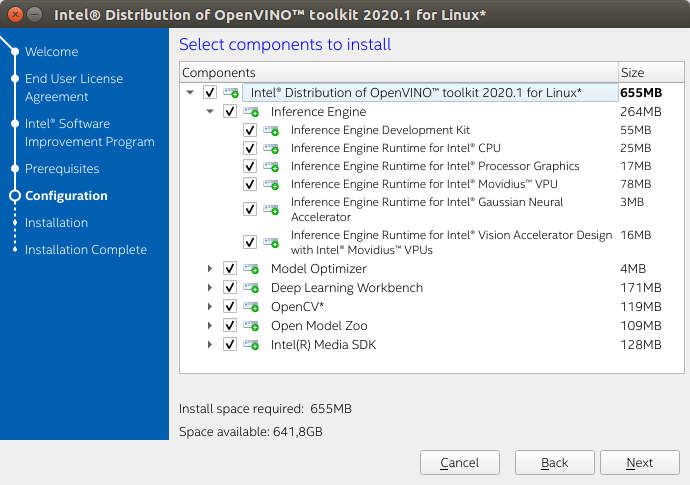
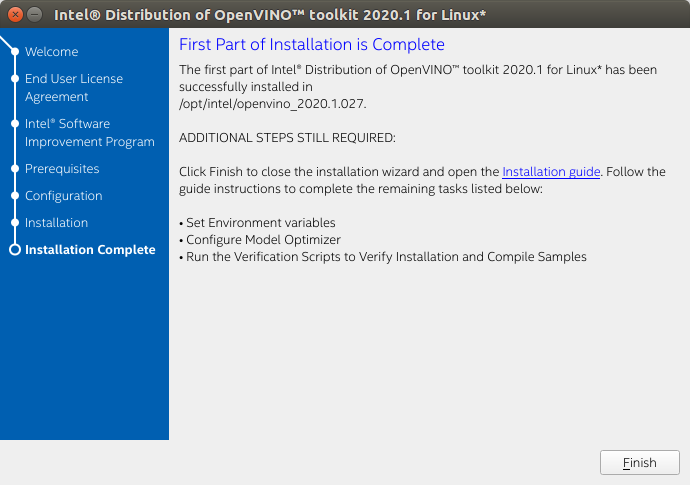
When installed as root the default installation directory for the Intel Distribution of OpenVINO is /opt/intel/openvino_<version>/For simplicity, a symbolic link to the latest installation is also created: /opt/intel/openvino/ - Complete the interface, indicating that OpenVINO has been installed:
# Install External Software Dependencies
Note: If you install OpenVINO to a non-default installation directory, replace /opt/intel with the directory where the software is installed.
These dependencies are required for:
- Intel-optimized build of OpenCV library
- Deep Learning Inference Engine
- Deep Learning Model Optimizer tools
1.Change to the install_dependencies directory:
cd /opt/intel/openvino/install_dependencies
2.Run a script to download and install the external software dependencies:
sudo -E ./install_openvino_dependencies.sh
# Set the Environment Variables
Before compiling and running the OpenVINO application, you must update multiple environment variables.
Set the environment variables, the steps are as follows:
- Open the .bashrc file in <user_directory>:
vi /.bashrc - Add this line of commands to the end of the file:
source/opt/intel/openvino/bin/setupvars.sh - Save and close the file: press the Esc key and enter:
wq - To test your change, open a new terminal. You will see:
[setupvars.sh] OpenVINO environment initialized.
The configuration is successful.
# Configure the Model Optimizer
- Go to the Model Optimizer prerequisites directory:
cd /opt/intel/openvino/deployment_tools/model_optimizer/install_prerequisites - Run the script to configure the Model Optimizer for Caffe, TensorFlow, MXNet, Kaldi*, and ONNX:
$ sudo ./install_prerequisites.sh
You can also execute the corresponding version as needed:
caffe:
sudo ./install_prerequisites_caffe.sh
TensorFlow:
sudo./install_prerequisites_tf.sh
MXNet:
sudo ./install_prerequisites_mxnet.sh
ONNX:
sudo ./install_prerequisites_onnx.sh
Kaldi:
sudo ./install_prerequisites_kaldi.sh
# Run the Verification Scripts to Verify Installation
Go to the Inference Engine demo directory:
cd /opt/intel/openvino/deployment_tools/demoRun the Image Classification verification script:
./demo_squeezenet_download_convert_run.sh
This verification script downloads a SqueezeNet model, uses the Model Optimizer to convert the model to the .bin and .xml Intermediate Representation (IR) files. The Inference Engine requires this model conversion so it can use the IR as input and achieve optimum performance on Intel hardware.
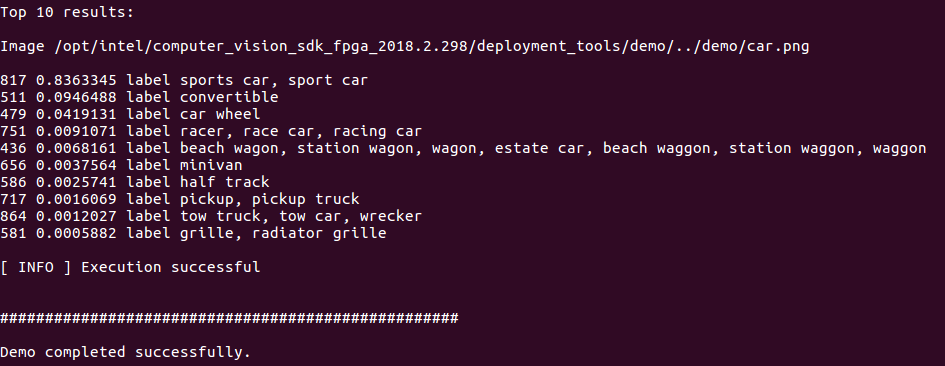
This verification script builds the Image Classification Sample Async application and run it with the car.png image located in the demo directory. When the verification script completes, you will have the label and confidence for the top-10 categories:
Run the Inference Pipeline verification script:
./demo_security_barrier_camera.shThis script downloads three pre-trained model IRs, builds the Security Barrier Camera Demo application, and runs it with the downloaded models and the car_1.bmp image from the demo directory to show an inference pipeline. The verification script uses vehicle recognition in which vehicle attributes build on each other to narrow in on a specific attribute.
First, an object is identified as a vehicle. This identification is used as input to the next model, which identifies specific vehicle attributes, including the license plate. Finally, the attributes identified as the license plate are used as input to the third model, which recognizes specific characters in the license plate.
When the verification script completes, you will see an image that displays the resulting frame with detections rendered as bounding boxes, and text: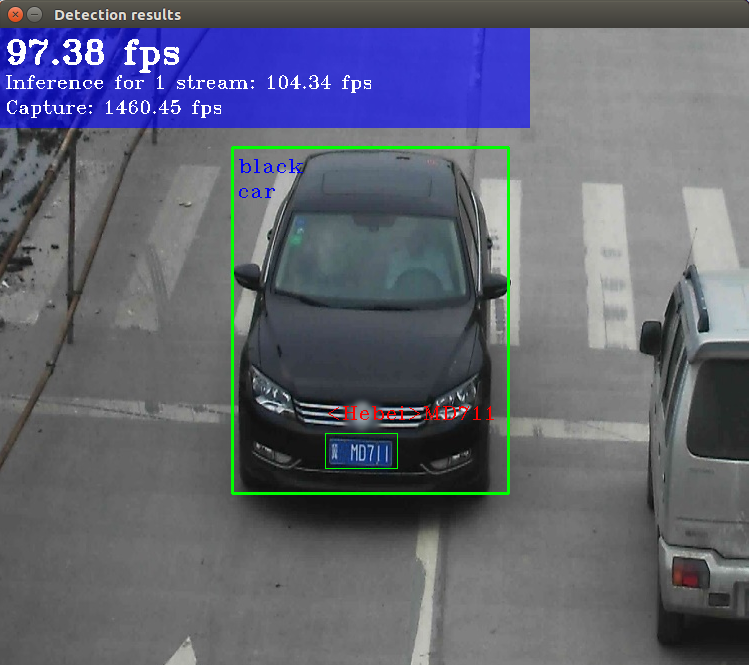
Close the image viewer window to complete the verification script.
To learn about the verification scripts, see the README.txt file in /opt/intel/openvino/deployment_tools/demo.
Now, OpenVINO installation is complete!
Reference: Intel official installation documentation