# Preparatory work
# Download Software Development Kit(SDK)
- Go to official website (opens new window)
- Click Documentation

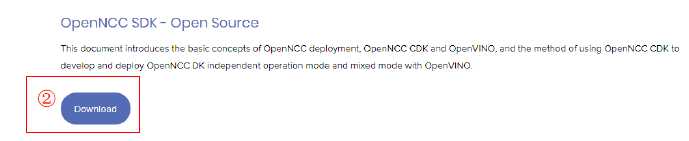
- Download the zip file or copy the address and use Git to clone it.
After download completed, go to openncc/Platform,the directory is as follows:
└─ Platform
	├─ Linux
	|   └─ NVIDIA
	|   └─ RaspberryPi
	|   └─ Ubuntu
	├─ Windows
	├─ Custom
	├─ README.md
Select the required file directory to enter, the corresponding folder contains the scripts for environment building.
Warning: The environment builder script will automatically generate and overwrite related files, please make sure it is the first time you run it or have completed a backup before running it.
# Quick Start to Linux
# Environment Construction
- Go to the directory
opennccc/Platform/Linux/Ubuntu. - Right click to open the terminal.
- Enter the command
./build_ubuntu.sh.
The generated directory is as follows.:
└─ Ubuntu
	├─ Example
	├─ Source
	├─ Viewer
	├─ build_Ubuntu.sh
	├─ README.md
# OpenNCC_Linux Operation Demo
Go to the directory: openncc/Platform/Linux/Ubuntu/Viewer/OpenNcc_Linux.
Right-click to open the terminal and execute
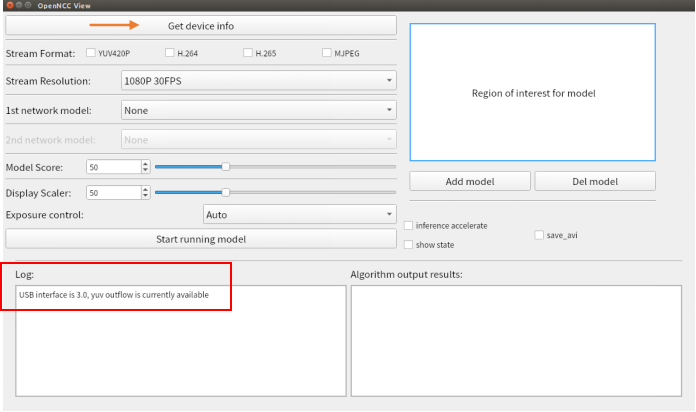
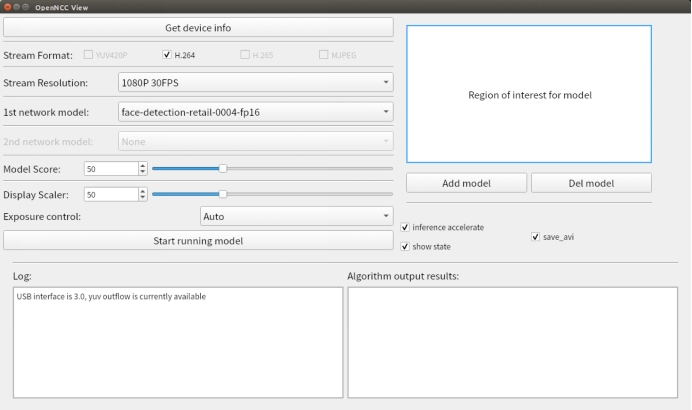
sudo ./AppRunl to start the software.Connect the OpenNCC camera to the USB 3.0 port of your computer and click on the Get device info button to get the device information, at this point there will be two prompts in the log area.:
- USB3.0:USB interface is 3.0, yuv outflow is currently available。
- USB2.0:USB interface is not 3.0, yuv outflow will be disabled。
Tip: The OpenNCC TYPE-C interface has two modes of positive and negative access, corresponding to USB3.0 and USB2.0 respectively. The USB2.0 mode temporarily disables the YUV420P format video stream output due to the transfer rate.

If you need to switch USB mode, rotate the TPYE-C port to access it again and click the Get device info button again. If there is still no change, please check your computer USB port type or contact us (opens new window).
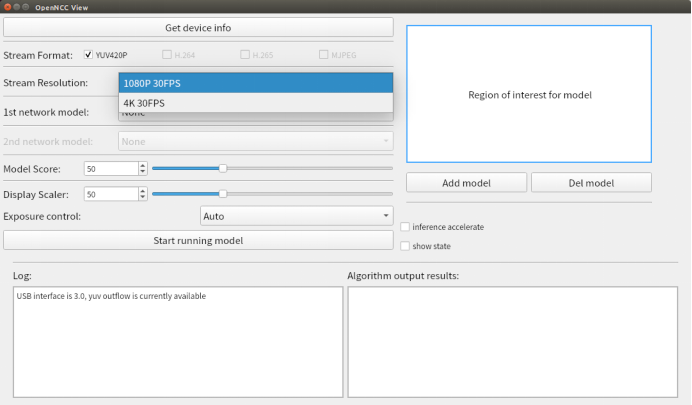
Choose any of the video streaming formats yuv420p/H.264/H.265/mjpeg.
Stream Resolution:Two resolutions are available, 1080p and 4K.(Specifically determined by OpenNCC product type)
1st network model:Select the algorithm model.
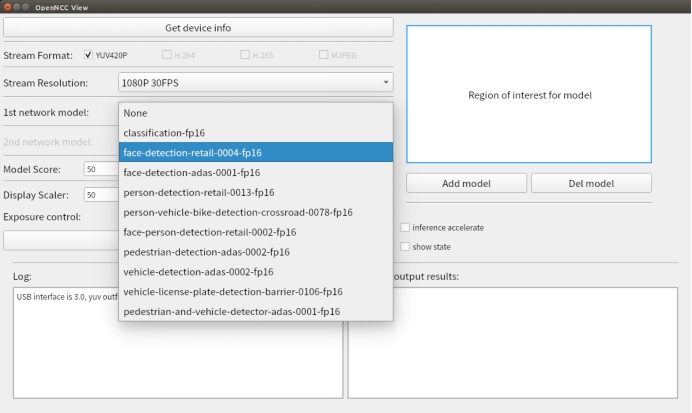
Currently supports more than 10 models to choose. If choose None that will not load models, only the original video stream could be displayed.
The algorithm area can be restricted by boxing the ROI region, and the algorithm will only recognize scenes within the region.(See the [running result](#_Running result) demonstration for details)
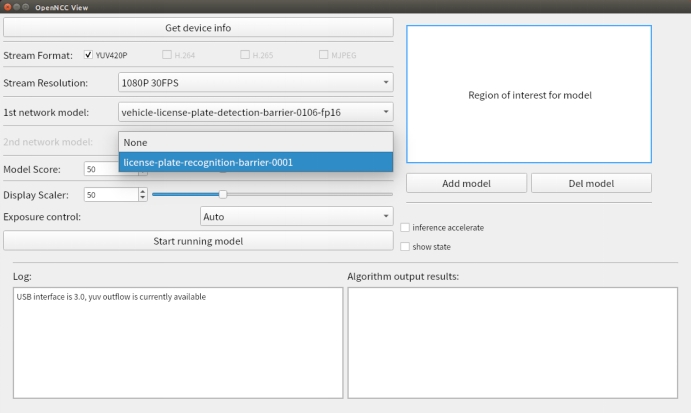
2nd network model:Select the secondary algorithm model.
Example model:vehicle-license-plate-detection-barrier-0106-fp16
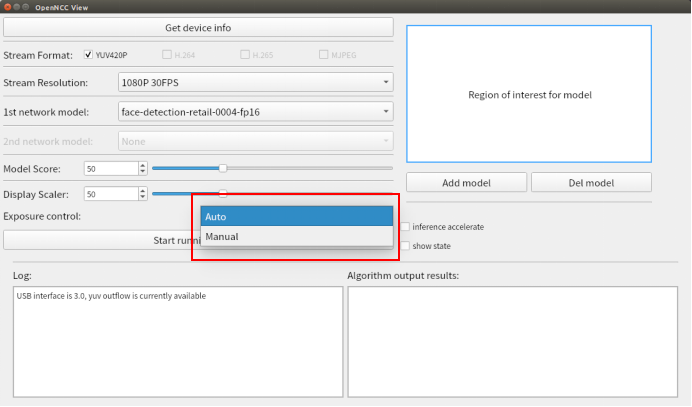
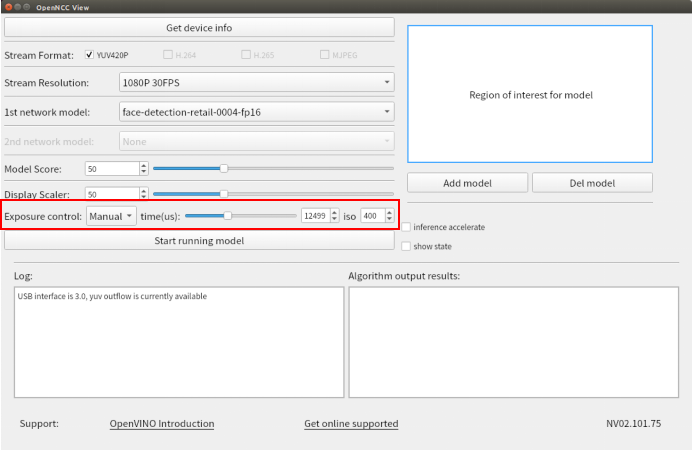
Model Score:Set the minimum score for the algorithm to recognize and reach the threshold before the recognition result will be framed in the screen.Display Scaler: Set the video display window size, and you can adjust the display window resolution.Exposure control:Set the exposure, you can choose Auto and Manual, when you choose Manual, you can set your own Exposure times and iso.
- Switch
show state,l Select whether to display current status information on the screen, including video stream frame rate, algorithm frame rate, resolution, and device id. - Switch
inference accelerate,Select whether to enable algorithm acceleration. (Must be selected before loading the algorithm model).

- Switch
save_avi,l The video will be saved to the directory openncc/Platform/Linux/Viewer/OpenNcc_Linux/avi folder with the time named avi file after opening the video stream. When the video stream is closed, the video will stop saving. (yuv420p does not have this item)
- Click
Start running models, Open the video stream. See [running result](# Running result) for running results
# Quick Start to Windows
# Environment Construction
Go to openncc/Platform/Windows.
Double-click to run
build_windows.bat.The results are as follows:
└─ Windows
	├─ Source
	├─ Viewer
	├─ build_windows.sh
	├─ README.md
- After the script runs successfully, go to the openncc/Platform/Windows/Drivers directory and install the Windows USB driver. Detailed installation steps can be found in OpenNCC_USB_Driver_install_guide_win.pdf。
# OpenNCC_Windows Operation Demo
- Go to the directory: openncc/Platform/Windows/Viewer/OpenNcc_Windows.
- Double-click to run
OpenNCC.exe. - Following steps are the same as OpenNCC_Linux
# Quick Start to Raspberry Pi
# Environment Construction
Open terminal.
Go to openncc/Platform/Linux/RaspberryPi.
Enter command
./build_raspberrypi.sh.
After running successfully, the following directory will be generated:
└── RaspberryPi
	├── Example
	├── Source
	├── Viewer
	├── build_raspberrypi.sh
	├── README.md
# OpenNCC_Raspberry Operation Demo
Tip: Before running OpenNCC_Raspberry, please check the device number and contact us (opens new window) for the key, see openncc/Platform/Raspberry/ReadMe.md for details.
- Copy the key file (eyecloud.key) to the directory: openncc/Platform/Linux/RaspberryPi/Viewer/OpenNcc_Raspberry/Configuration/fw.
- Go back to the directory: openncc/Platform/Linux/RaspberryPi/Viewer/OpenNcc_Raspberry.
- Open a terminal and execute
sudo ./AppRunto start the software. - Following steps are the same as OpenNCC_Linux。
# Quick Start to NVIDIA
# Environment Construction
Open terminal.
Go to openncc/Platform/Linux/NVIDIA.
Enter command
./build_nvidia.sh.
After running successfully, the following directory will be generated:
└─ NVIDIA
	├─ Example
	├─ Source
	├─ build_nvidia.sh
	├─ README.md
# Custom(Customization)
# Environment construction
Go to openncc/Platform/Custom.
Right click to open the terminal.
Enter command
./custom.sh
Tip: To run on a custom platform, please contact us (opens new window) for customization services.
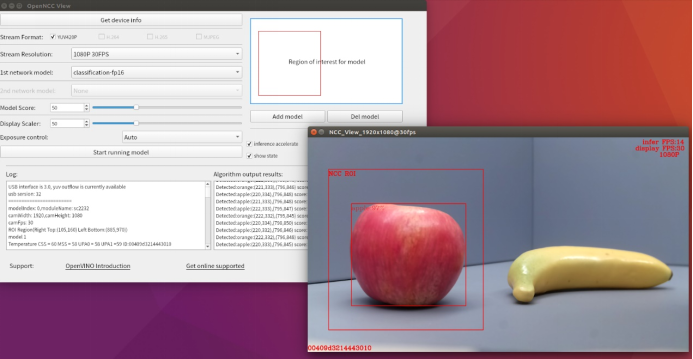
# Running result
Take the object classification algorithm model as an example.:
Banana results in the algorithm area:
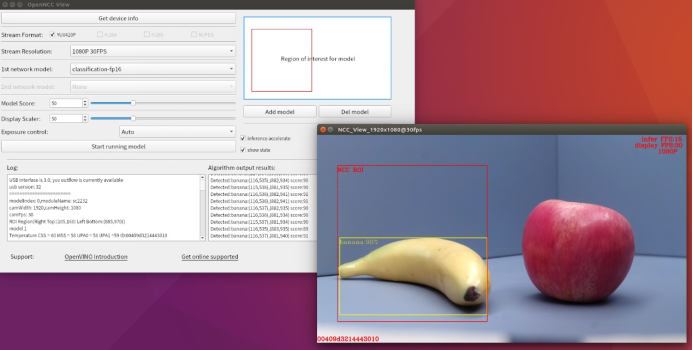
Apple results in the algorithm area: